azure, o365
You may want to stop end users from Accessing the Azure AD portal, as they can all view all user accounts and the email addresses associated with user accounts.
Follow the steps below to block user from Accessing Azure AD.
Login to Azure as global admin
Go the Azure AD > User Settings
Also select ‘No‘ for ‘Users can register applications’
Select ‘Yes‘ to ‘Restrict access to Azure AD administration portal’
Optional – Select ‘No‘ for ‘LinkedIn account connections’

End users will now be unable to view other users email addresses and names in Azure AD.

Exchange, networking, Windows Server
Firstly check to see if IIS is running via services.msc
If you attempt to start the IIS service and it fails you may get the following error message in Event Viewer
The Windows Process Activation Service encountered an error trying to read configuration data from file’\\?\Windows\system32\inetsrv\config\applicationHost.config, line number

If so, navigate to C:\inetpub\history than the latest subfolder and copy the applicationHost.config and copy it to C:\Windows\system32\inetsrv\config\ then restart the World Wide Web Publishing Server and the related others, or reboot the server.

Exchange, networking, Windows Server, windows update
Post Windows Updates you may notice MS Exchange services and other dependent services are disabled you can check this by viewing services.msc
Execute the powershell commands below on the Exchange Server to get the services up and running.
First, we have to know which services there are and which need to have their startup type changed. I used the Get-Service cmdlet to find out. In my case, I was just interested in the Exchange Services, so I needed to filter them with the following command:
Get-Service | Where-Object { $_.DisplayName –like “Microsoft Exchange *”} | ft Name,Status
The output told me which services needed to have their startup type changed. To do that, I only had to change the entry after the last Pipe. (To change the startup type I don’t need a displayed output, but I need to change the startup type for the selected services.) This I did with the following cmdlet:
Get-Service | Where-Object { $_.DisplayName –like “Microsoft Exchange *” } | Set-Service –StartupType Automatic
The Exchange Services startup type was changed from disabled to automatic. But they were still not running. To start the services, we can use the following cmdlet:
Get-Service | Where-Object { $_.DisplayName –like “Microsoft Exchange *” } | Start-Service
Next step, IIS
After the Exchange Services have all changed their startup type and status, we are almost done. There is another service we also have to think about – IIS.
To edit the IIS Admin Service, we can follow the same concept as we did with the Exchange Services. First, we need to identify the services and set the startup type to automatic. For that, we can use this cmdlet:
Get-Service | Where-Object { $_.DisplayName –eq “IIS Admin Service” } | Set-Service –StartupType Automatic
Last but not least, we also need to start IIS Admin Service. This we can do with the following cmdlet:
Get-Service | Where-Object { $_.DisplayName –eq “IIS Admin Service” } | Start-Service

windows 10
How to access Windows 10 start up location to make program run at startup or remove programs that run at startup
The All Users Startup Folder is located at the following path:
C:\ProgramData\Microsoft\Windows\Start Menu\Programs\StartUp
The Current User Startup Folder is located here:
C:\Users\[Username]\AppData\Roaming\Microsoft\Windows\Start Menu\Programs\Startup
To find the Startup folder, the quickest way is to do the following:
- Hold down the Windows key, and type R
- Type: shell:startup
- Click OK
There is an easy way to “bookmark” this folder.
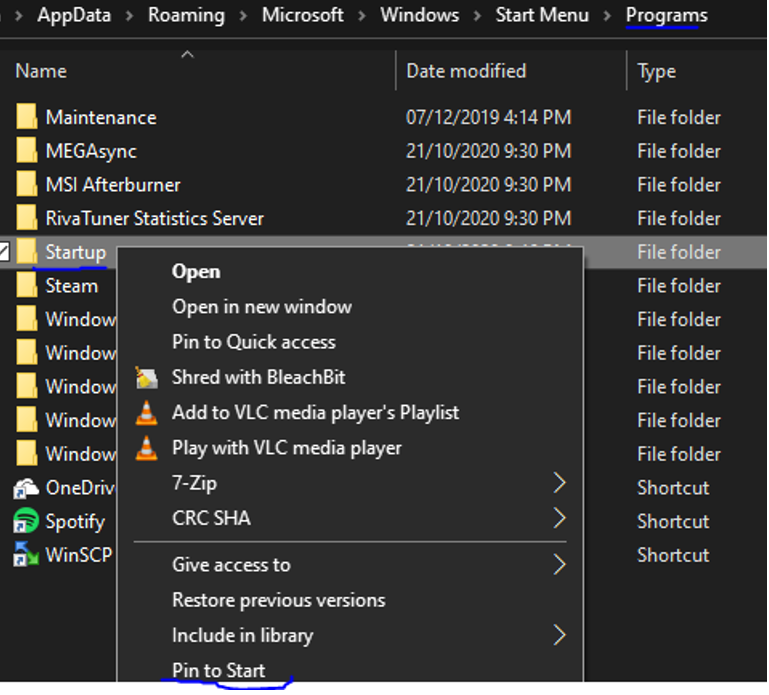
First you need to go up one folder level. You can do this either by clicking on “Programs” in the address bar, or by clicking the up arrow to the left of the address bar.
Then, right-click the Startup folder, and choose Pin to Start:
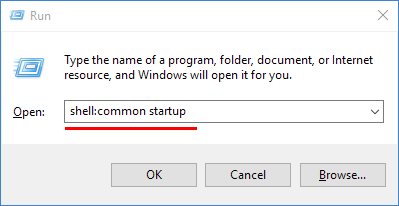
Note also that there is actually a second Startup folder. The Startup folder above is for your user account only.
The second Startup folder is for programs that run at startup for all users on the computer. To find that Startup folder, we have to modify our Win-R trick slightly:
If the program you’re seeing at startup isn’t in either of the Startup folders, try uninstalling the program itself. Many programs run when Windows starts, but they are launched via other more complicated methods.
networking, windows 10, windows update
ISSUE:
I have a client where the Windows 10 update was installed overnight and it has broken the ability for one of the pc’s to access the other pc for file shares. It is a small network (only 2 pc’s) both running W10 Pro. The main pc can see the shares on the other pc but the one I want to see the main pc shares can only see the main pc in networks but not see any shares.
RESOLUTION:
On the sharing pc, after many attempts in getting it going, I did this and it worked:
- Control Panel > System and Security > Administrative Tools > Local Security Policy > expand Local Policies > Security options
- Click on Network security: Lan Manager Authentication level > Then in the field select > Send NTLMv2 responses only > click on Apply, then ok and close all
- Restart your pc.
NOTE:
Windows 10 version 1709 disables SMB 1.0

networking, windows 10
Ethernet and/or WiFi adapter sees available network,
But will not accept tcp/ip address – Will see Network icon in System Tray but will have “Exclamation mark”.
A reset of winsock and/or IP stack, may resolve the problem.
Usually – have success with a reset of winsock, then a restart.
WARNING !!!
This command must be applied at the local machine level.
Applying command on RDS network stack, will result in loss of connection for all users !!!
1. In the search box on the taskbar, type Command prompt, press and hold (or right-click) Command prompt, and then select Run as administrator > Yes.
Note:- Requires Administrator Credentials
2. At the “Administrative” Command prompt, run the following command.
- Type netsh winsock reset and press Enter.
- Restart computer.
Optional – Full technical Fix:-
At “Administrative” Command prompt, run the following commands in the listed order, and then check to see if that fixes your connection problem:
- Type netsh winsock reset and press Enter.
- Type netsh int ip reset and press Enter.
- Type ipconfig /release and press Enter.
- Type ipconfig /renew and press Enter.
- Type ipconfig /flushdns and press Enter.