
microsoft, networking, windows 10, windows 11
Bypass Windows 11 Network Setup to create a local user account.
Whether you are turning on your new device for the first time or performed a clean installation of Windows 11, say are always prompted to join a WiFi Network if you are not using an Ethernet cable to connect to the internet, follow the steps below to bypass this network setup so you can create a local account without needing a Microsoft account.
On the “Let’s connect you to a network” page, use the Shift + F10 keyboard shortcut.
In Command Prompt, type the OOBE\BYPASSNRO command to bypass network requirements on Windows 11 and press Enter.
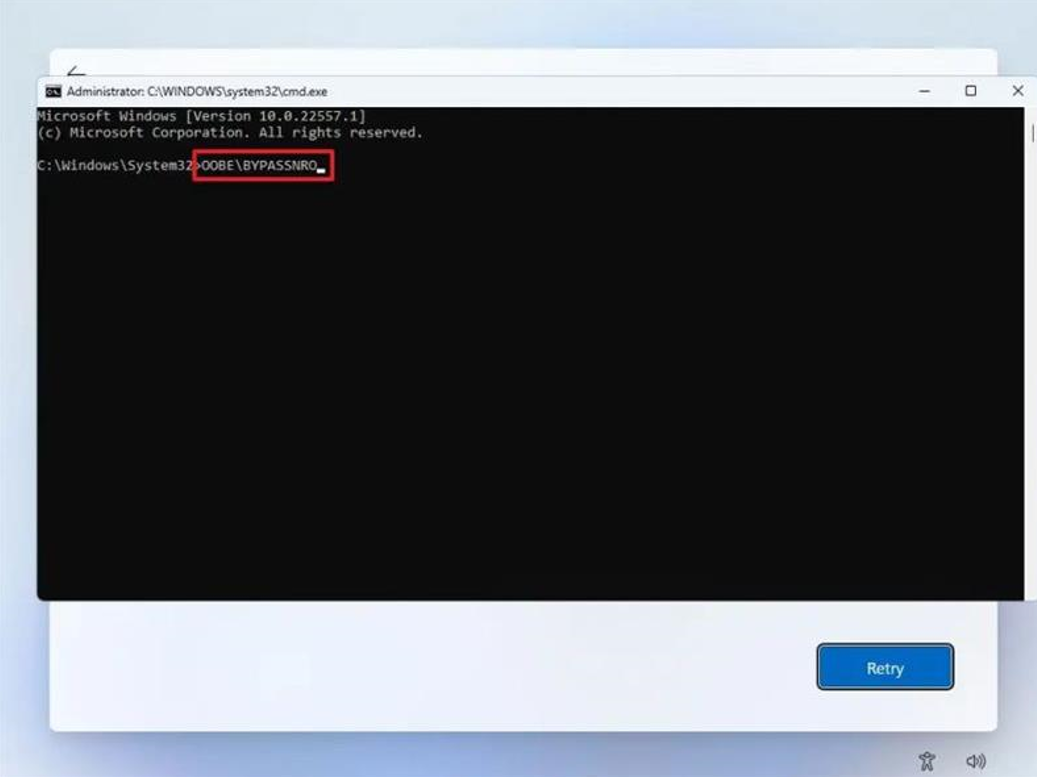
The computer will restart automatically, and the out-of-box experience (OOBE) will start again.
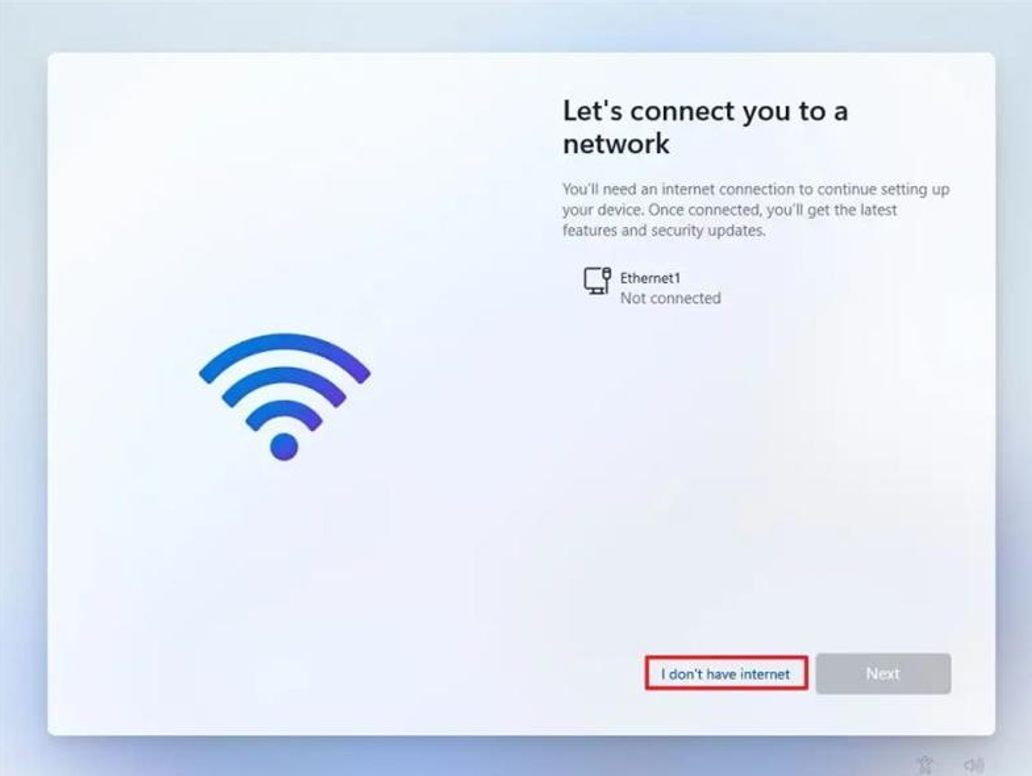
Quick note: You will need to select the region and keyboard settings one more time to get to the network connection page.
Click the “I don’t have internet” option.
Click the “Continue with limited setup” option.
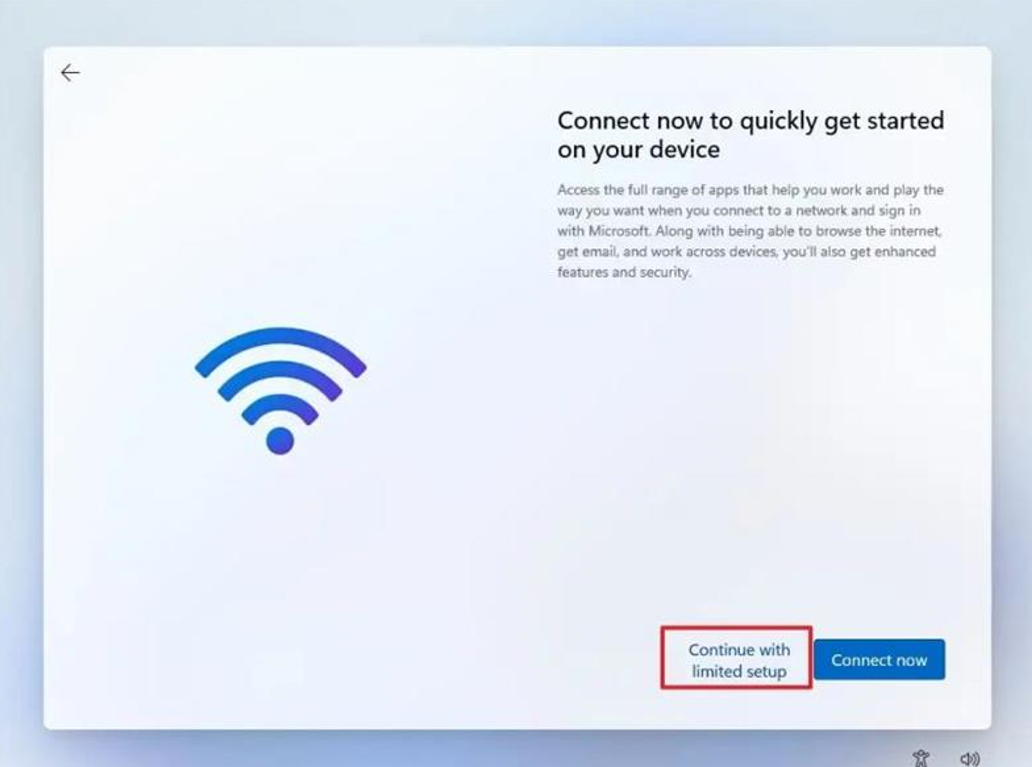
You have now bypassed the Windows 11 Network Setup menu and create a local user account.

Exchange, networking, Windows Server, windows update
Post Windows Updates you may notice MS Exchange services and other dependent services are disabled you can check this by viewing services.msc
Execute the powershell commands below on the Exchange Server to get the services up and running.
First, we have to know which services there are and which need to have their startup type changed. I used the Get-Service cmdlet to find out. In my case, I was just interested in the Exchange Services, so I needed to filter them with the following command:
Get-Service | Where-Object { $_.DisplayName –like “Microsoft Exchange *”} | ft Name,Status
The output told me which services needed to have their startup type changed. To do that, I only had to change the entry after the last Pipe. (To change the startup type I don’t need a displayed output, but I need to change the startup type for the selected services.) This I did with the following cmdlet:
Get-Service | Where-Object { $_.DisplayName –like “Microsoft Exchange *” } | Set-Service –StartupType Automatic
The Exchange Services startup type was changed from disabled to automatic. But they were still not running. To start the services, we can use the following cmdlet:
Get-Service | Where-Object { $_.DisplayName –like “Microsoft Exchange *” } | Start-Service
Next step, IIS
After the Exchange Services have all changed their startup type and status, we are almost done. There is another service we also have to think about – IIS.
To edit the IIS Admin Service, we can follow the same concept as we did with the Exchange Services. First, we need to identify the services and set the startup type to automatic. For that, we can use this cmdlet:
Get-Service | Where-Object { $_.DisplayName –eq “IIS Admin Service” } | Set-Service –StartupType Automatic
Last but not least, we also need to start IIS Admin Service. This we can do with the following cmdlet:
Get-Service | Where-Object { $_.DisplayName –eq “IIS Admin Service” } | Start-Service

networking, windows 10
Ethernet and/or WiFi adapter sees available network,
But will not accept tcp/ip address – Will see Network icon in System Tray but will have “Exclamation mark”.
A reset of winsock and/or IP stack, may resolve the problem.
Usually – have success with a reset of winsock, then a restart.
WARNING !!!
This command must be applied at the local machine level.
Applying command on RDS network stack, will result in loss of connection for all users !!!
1. In the search box on the taskbar, type Command prompt, press and hold (or right-click) Command prompt, and then select Run as administrator > Yes.
Note:- Requires Administrator Credentials
2. At the “Administrative” Command prompt, run the following command.
- Type netsh winsock reset and press Enter.
- Restart computer.
Optional – Full technical Fix:-
At “Administrative” Command prompt, run the following commands in the listed order, and then check to see if that fixes your connection problem:
- Type netsh winsock reset and press Enter.
- Type netsh int ip reset and press Enter.
- Type ipconfig /release and press Enter.
- Type ipconfig /renew and press Enter.
- Type ipconfig /flushdns and press Enter.