
azure, IT Cyber Security Technical Knowledge, licensing, m365, microsoft, o365
When you install Office 365 ProPlus / M365 Apps, you may be presented with a screen which says ‘Use this account everywhere on your device’.
Below is how to prevent that screen appearing, and prevent the Azure AD device registration that may result from pressing yes.
All goes well, until they get presented with this, at which point in a state of confusion they likely either just press yes, or possibly another option as we will see below:

Hide this screen by preventing Azure AD registration
This screen can be hidden by editing the registry as per https://docs.microsoft.com/en-us/azure/active-directory/devices/hybrid-azuread-join-plan#review-things-you-should-know:
You can prevent your domain joined device from being Azure AD registered by adding this registry key – HKLM\SOFTWARE\Policies\Microsoft\Windows\WorkplaceJoin, “BlockAADWorkplaceJoin”=dword:00000001
This registry key takes effect immediately and does not require a reboot. You won’t see the screen again. Note that you can still use Hybrid join via AD Connect.

active directory, licensing, microsoft, rds, rwa, Windows Server
You may want to move the existing RDS licenses to a new server to put an old operating system out of production or just upgrade in general.
Login to the server as an administrator
Install the Remote Desktop Licensing Server and Gateway Role via Server Manager
Once installed open Remote Desktop Licensing Manager from Server Manager

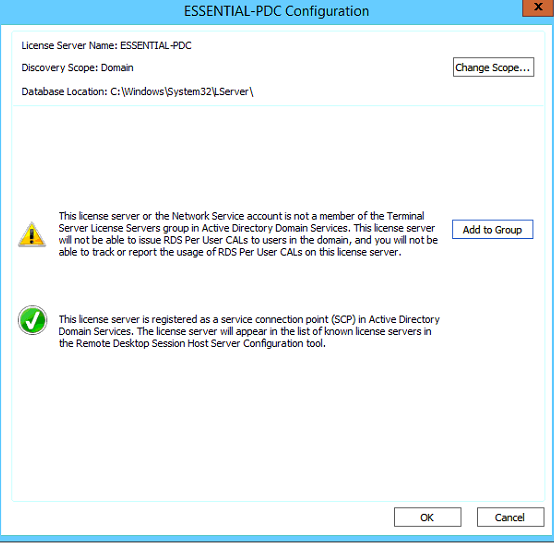
Add the current server into the Terminal Server License Server group as per below,
Select Add to group.


Right click on the server name and select Activate Server

Select Next at the Connect Method screen, (Automatic connection (recommended) is the default)
Enter the relevant information (Company Information) then select Next
Proceed to the next page and fill out additional information.
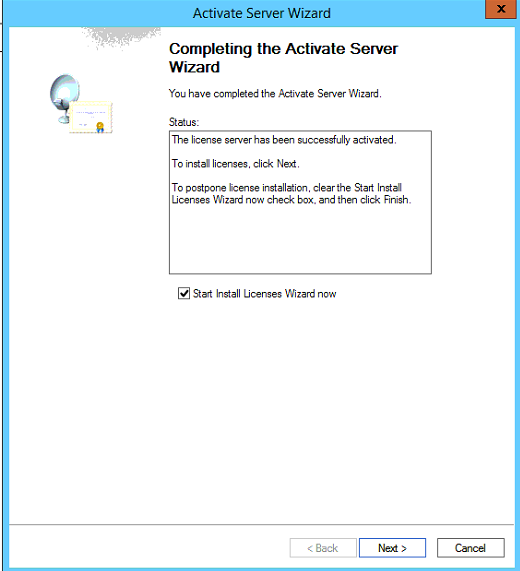
Click Next and the server will activate
On the new licensing server add the old server into the console by select Action > Connect
Enter the IP Address of the old licensing server.
The old server should now be visible on the new server.
To get the licensing ID right click on the old server and select properties
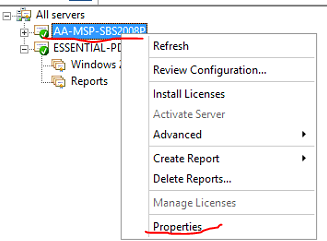
To get the licensing ID right click on the old server and select properties

Select the new licensing server, then go to Action > Manage licenses
Once the window opens select Next
Select the first option as shown below.
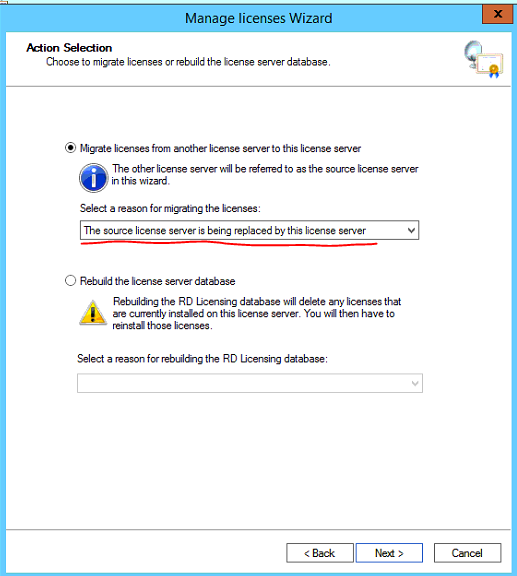
Select the checkbox and select the operation system the old licensing server is running.
Enter the license server ID previously copied, Select Next
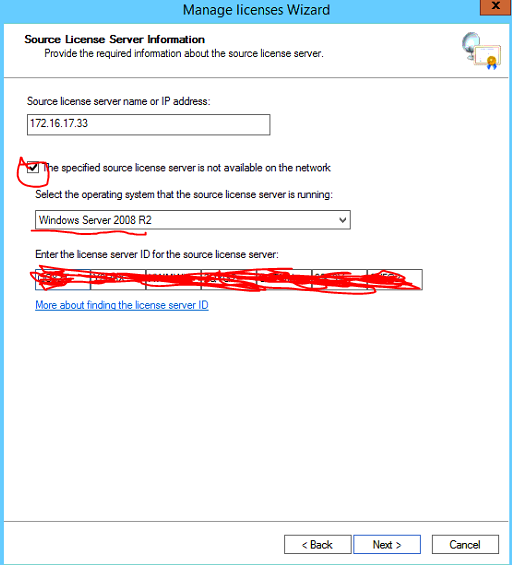
Tick the checkbox to agree to manually remote the licenses from the source server then select next.
If the old licensing Server is running Windows Server 2008 not 2008 R2 you will need the original RDS CAL licenses (Refer to documentation) to apply to the new licensing server as a 2008 server cannot automatically migrate the RDS CAL licenses, only 2008 R2 and above.
If the old licensing Server is running 2008 R2 or above proceed through the wizard to migrate the RDS CAL licenses.
After you have verified the licences are activated and functional you can deactivate the old RDS licensing server.
Once deactivated uninstall the RDS licensing role via Server Manager


