
active directory, licensing, microsoft, rds, rwa, Windows Server
You may want to move the existing RDS licenses to a new server to put an old operating system out of production or just upgrade in general.
Login to the server as an administrator
Install the Remote Desktop Licensing Server and Gateway Role via Server Manager
Once installed open Remote Desktop Licensing Manager from Server Manager

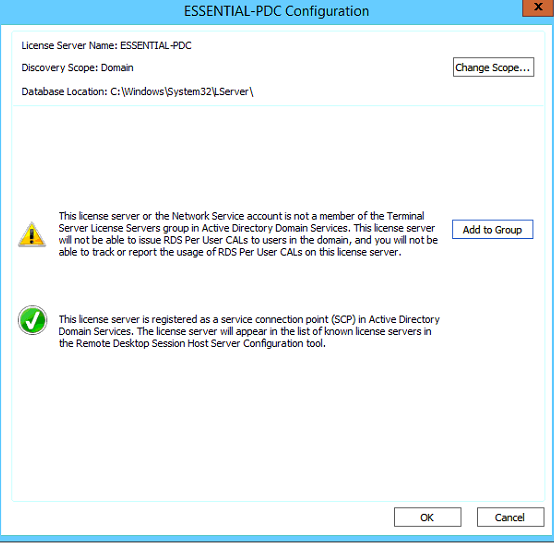
Add the current server into the Terminal Server License Server group as per below,
Select Add to group.


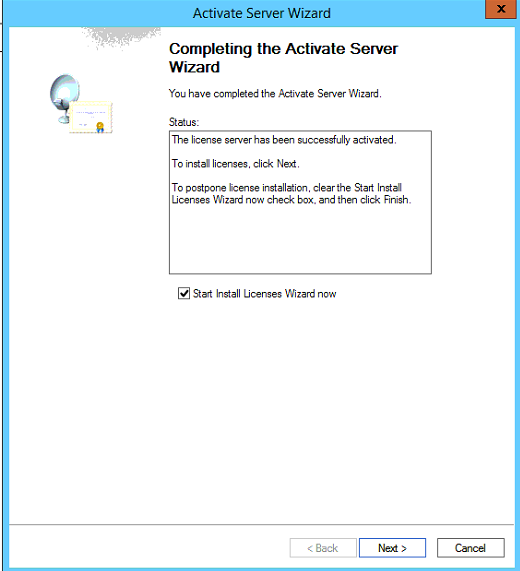
Right click on the server name and select Activate Server

Select Next at the Connect Method screen, (Automatic connection (recommended) is the default)
Enter the relevant information (Company Information) then select Next
Proceed to the next page and fill out additional information.
Click Next and the server will activate
On the new licensing server add the old server into the console by select Action > Connect
Enter the IP Address of the old licensing server.
The old server should now be visible on the new server.
To get the licensing ID right click on the old server and select properties
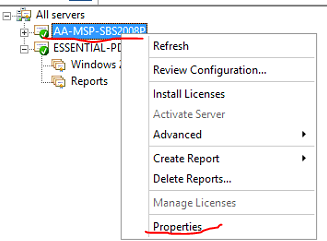
To get the licensing ID right click on the old server and select properties

Select the new licensing server, then go to Action > Manage licenses
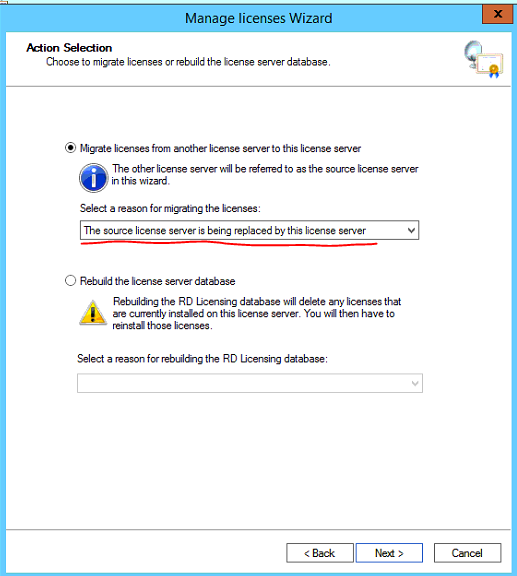
Once the window opens select Next
Select the first option as shown below.
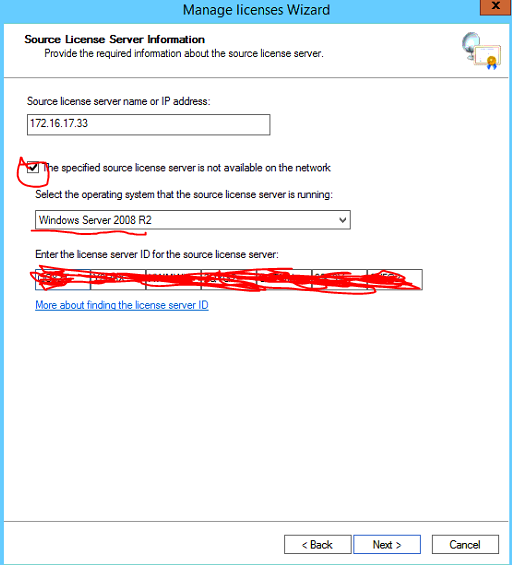
Select the checkbox and select the operation system the old licensing server is running.
Enter the license server ID previously copied, Select Next
Tick the checkbox to agree to manually remote the licenses from the source server then select next.
If the old licensing Server is running Windows Server 2008 not 2008 R2 you will need the original RDS CAL licenses (Refer to documentation) to apply to the new licensing server as a 2008 server cannot automatically migrate the RDS CAL licenses, only 2008 R2 and above.
If the old licensing Server is running 2008 R2 or above proceed through the wizard to migrate the RDS CAL licenses.
After you have verified the licences are activated and functional you can deactivate the old RDS licensing server.
Once deactivated uninstall the RDS licensing role via Server Manager

active directory, hyper-v, microsoft, networking, rds, rwa, Windows Server, windows update
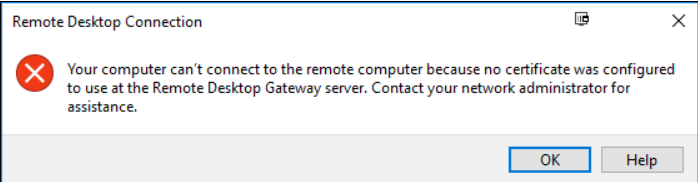
Remote Web Access (RWA) SSL Gateway not working after Windows Update
After installing Windows updates you may get the following error when trying to logon to RDS via RWA (Remote Web Access)
Log into the Domain Controller
Open Powershell as ADMIN
Run the following command:
dism /online /Enable-Feature:Gateway-U

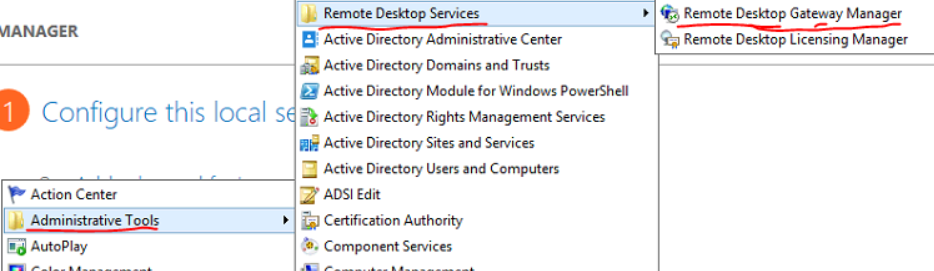
Open the Remote Desktop Gateway Manager from Administrative Tools > Remote Desktop Services.
Right click the server name then select Properties
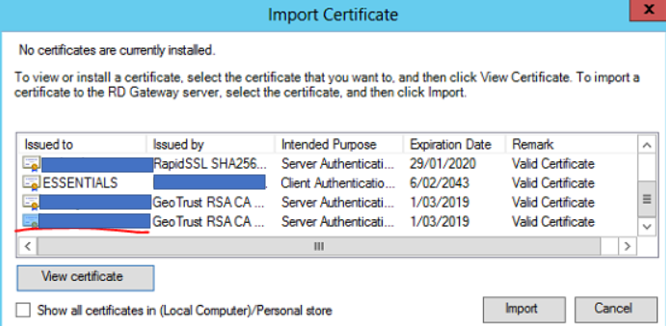
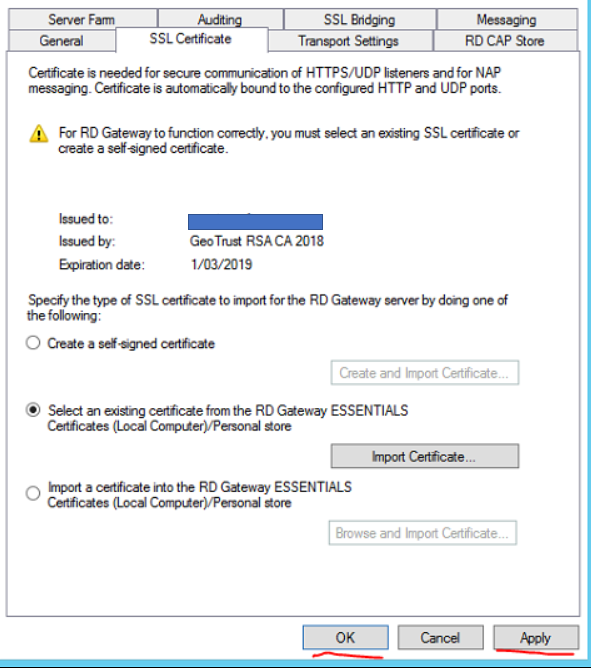
Select the SSL Certificate tab then select Import Certificate…
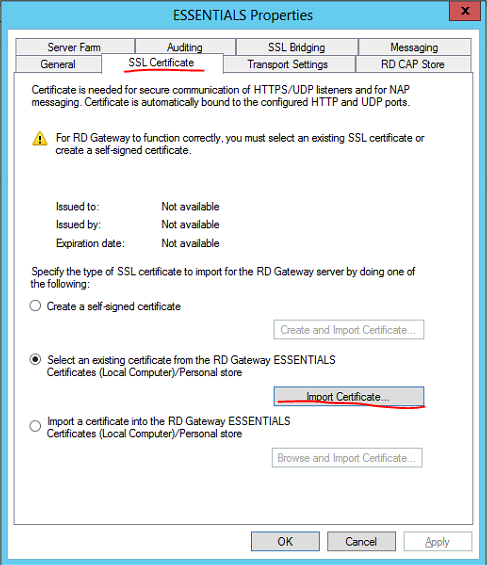
Select the correct SSL certificate for the Remote Desktop Gateway then select Import
Click Apply then OK
Close Remote Desktop Gateway Manager
Test connectivity via RWA

microsoft, networking, rds, teams, windows 10, Windows Server
Launch powershell as Admin on the workstation server where Microsoft Teams runs at start-up
Execute the following command:
Remove-ItemProperty -Path HKCU:\Software\Microsoft\Windows\CurrentVersion\Run -Name “com.squirrel.Teams.Teams”
Reboot server/workstation
If the above does not work login as an administrator and manually remove MS Teams from Add Programs and Features menu

microsoft, rds, Windows Server
How to modify RDS Idle Timeout and Keep alive time so users don’t get disconnected.
Logon to the RDS server in question.
Open local group policy
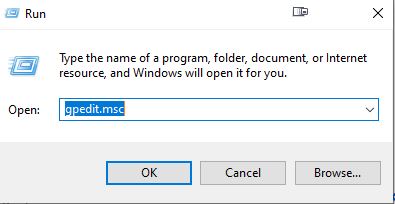
Win Key + R > gpedit.msc
Browse to Computer Config > Administrative Templates > Windows Components > Remote Desktop Services > Remote Desktop Session Host > Connections (enable keep alive)
Select Enabled for ‘Configure keep-alive connection interval’

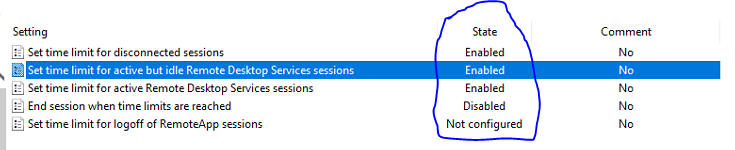
Then browse to Computer Config > Admin Templates > Windows Components > Remote Desktop Services > Remote Desktop Session Host > Session Time Limits.
Select the option shown below and enter a time limit that you see fit.

Repeat the same for the User Configuration
Browse to User Configuration\Policies\Administrative Templates\Windows Components\Remote Desktop Services\Remote Desktop Session Host\Session Time Limits
Select the option shown below and enter a time limit that you see fit.
Apply gpupdate /force via Powershell or Command Prompt on the RDS Server
microsoft, rds, Windows Server
In Windows Server 2019 RDS (Not specific to RDS) users default printer may reset from the default printer they previously set each time the server is rebooted.
You will need to edit the local GPO to stop Windows from managing default printers
On the RDS Server open Local GPO Editor
Windows Key + R
gpedit.msc
Browse to User Configuration > Administrative Templates > Control Panel > Printers
Set the setting ‘Turn off Windows default printer management’ to Enabled.
Perform reboot or gpupdate /force of the RDS Server.

If the above group policy does not work it may be due to the way end users connect via their RDP shortcut, If printer redirection is turned on that default printer on their local machine will be selected rather than the default printer for their RDS user profile.
To fix this apply the below group policy setting on the RDS server.
On the Server go into the Local Group Policy Editor:
Windows Key + R
gpedit.msc

In the Local Group Policy Editor navigate to Computer Configuration > Administrative Templates > Windows Components > Remote Desktop Services > Remote Desktop Session Host > Printer Redirection.

Enable the Do not allow client printer redirection rule to prevent the server to install “Redirected” printers.

Perform a gpudate /force on the RDS Server or perform a reboot of the RDS Server for the GP setting to be applied.