
microsoft, networking, windows 10, windows 11
Bypass Windows 11 Network Setup to create a local user account.
Whether you are turning on your new device for the first time or performed a clean installation of Windows 11, say are always prompted to join a WiFi Network if you are not using an Ethernet cable to connect to the internet, follow the steps below to bypass this network setup so you can create a local account without needing a Microsoft account.
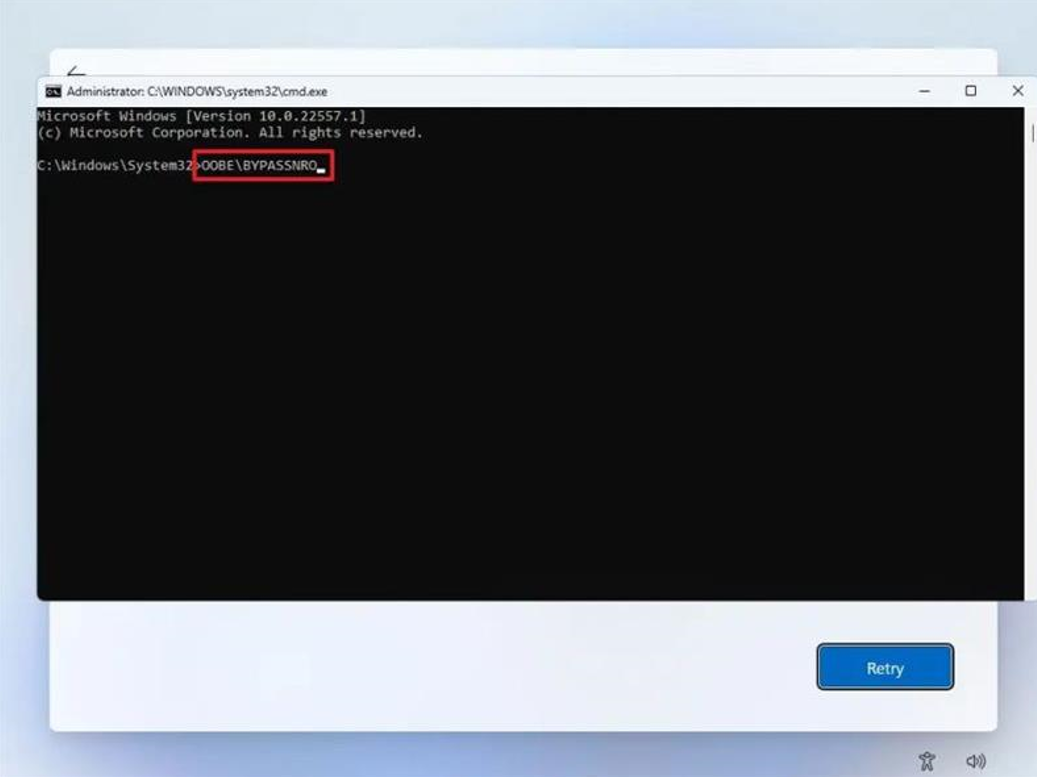
On the “Let’s connect you to a network” page, use the Shift + F10 keyboard shortcut.
In Command Prompt, type the OOBE\BYPASSNRO command to bypass network requirements on Windows 11 and press Enter.
The computer will restart automatically, and the out-of-box experience (OOBE) will start again.
Quick note: You will need to select the region and keyboard settings one more time to get to the network connection page.
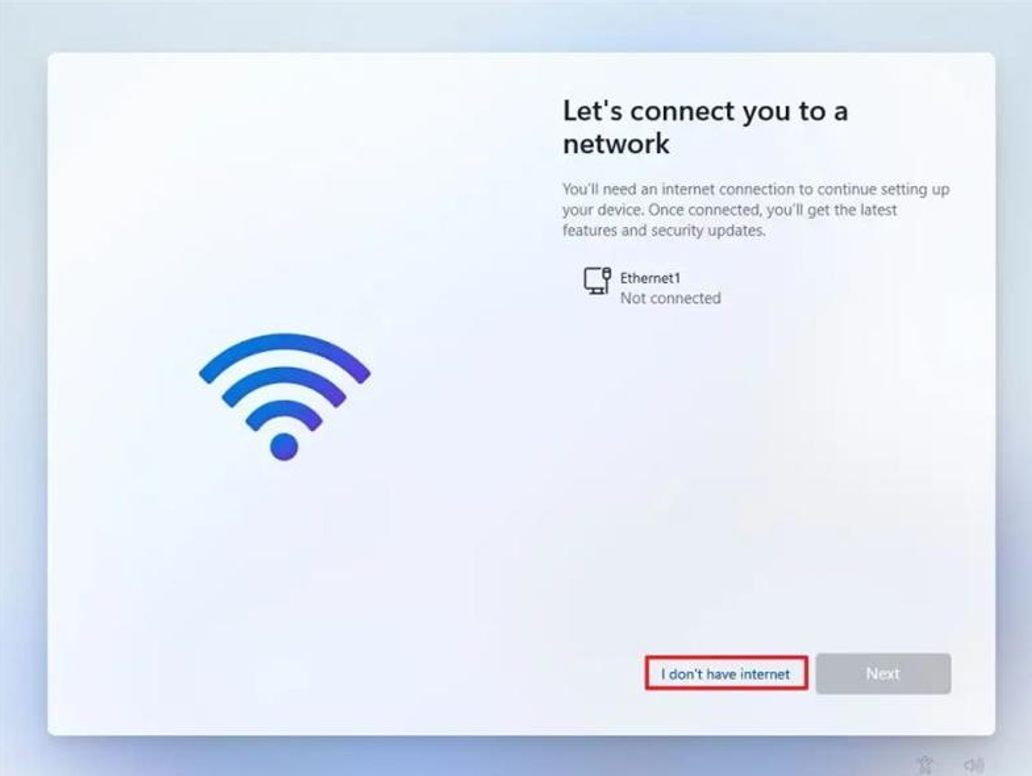
Click the “I don’t have internet” option.
Click the “Continue with limited setup” option.
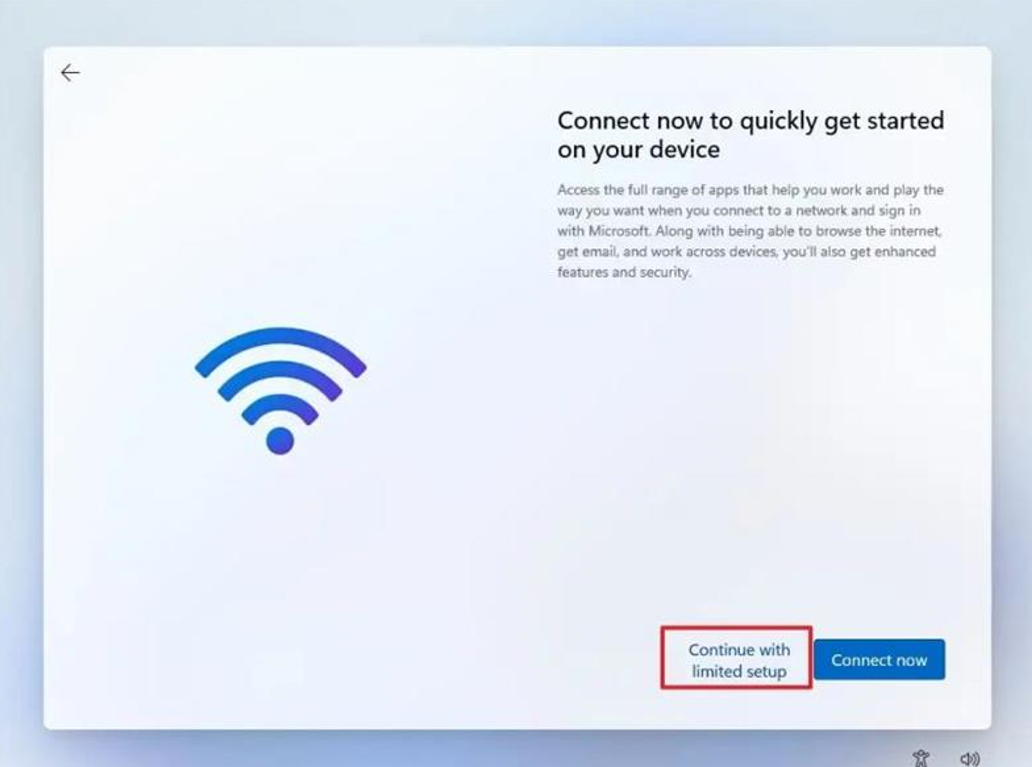
You have now bypassed the Windows 11 Network Setup menu and create a local user account.

active directory, auditing, compliance, microsoft, networking, shared folder, windows 10, Windows Server
Audit all access to folders and/or files on a server or workstation.
Log onto the server/workstation that you wish to enable auditing on.
Open Local Group Policy Editor.
CTRL + R
gpedit.msc

Browse to the following location: – Computer Configuration > Windows Settings > Security Settings > Local Policies > Audit Policy
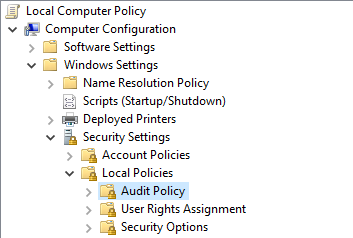
Double click ‘Audit object access’

Select Success and Failure
Click Apply then OK

Exit Local Group Policy Editor
Navigate to the folder/file you wish to track permission changes.
Right click the folder/file then select Properties.
Select the Security tab then select Advanced

Select the Auditing tab then select Continue (if prompted)

Click Add

Click Select a principal

Type ‘everyone’ then select Check Names. – Click OK

Set the Type: to All
Untick the default auditing permissions and only select ‘Change permissions’ – Click OK
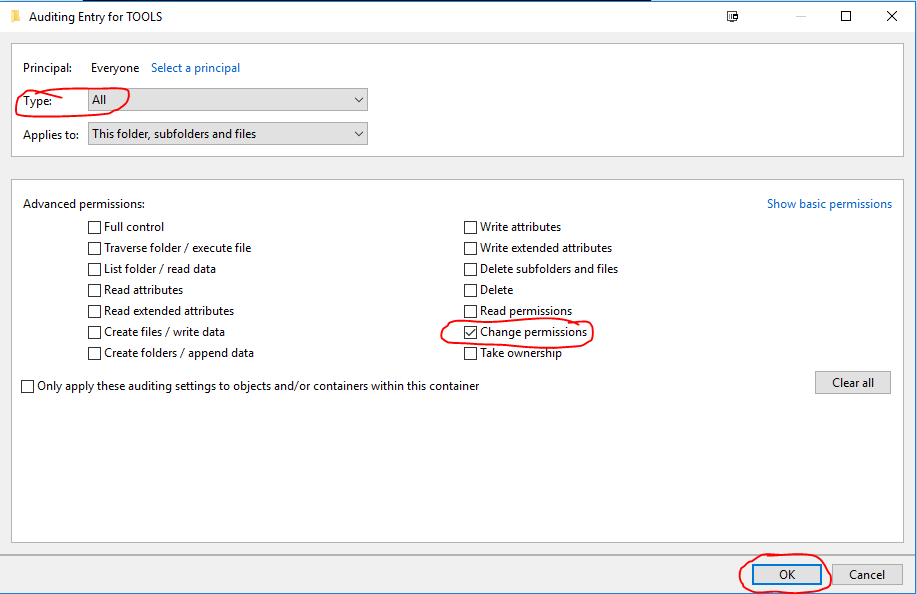
Click OK Twice more.
Open up cmd or powershell as ADMIN
Execute the command: gpupdate /force
Auditing is now implemented on the specific folders/files.
To check audit logs open Event Viewer.
Select the Security Logs
Filter the logs based on Event ID 4670

microsoft, networking, rds, teams, windows 10, Windows Server
Launch powershell as Admin on the workstation server where Microsoft Teams runs at start-up
Execute the following command:
Remove-ItemProperty -Path HKCU:\Software\Microsoft\Windows\CurrentVersion\Run -Name “com.squirrel.Teams.Teams”
Reboot server/workstation
If the above does not work login as an administrator and manually remove MS Teams from Add Programs and Features menu
windows 10
How to access Windows 10 start up location to make program run at startup or remove programs that run at startup
The All Users Startup Folder is located at the following path:
C:\ProgramData\Microsoft\Windows\Start Menu\Programs\StartUp
The Current User Startup Folder is located here:
C:\Users\[Username]\AppData\Roaming\Microsoft\Windows\Start Menu\Programs\Startup
To find the Startup folder, the quickest way is to do the following:
- Hold down the Windows key, and type R
- Type: shell:startup
- Click OK
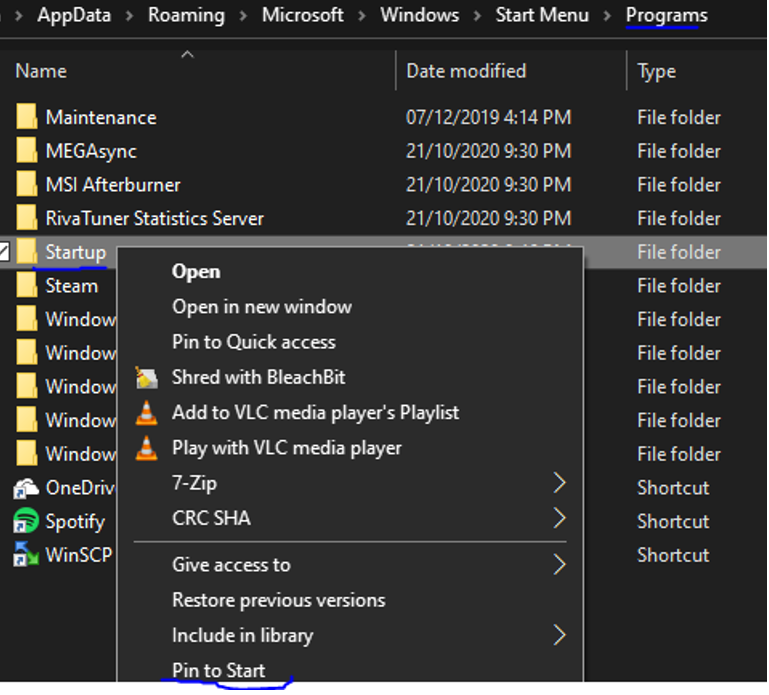
There is an easy way to “bookmark” this folder.
First you need to go up one folder level. You can do this either by clicking on “Programs” in the address bar, or by clicking the up arrow to the left of the address bar.
Then, right-click the Startup folder, and choose Pin to Start:
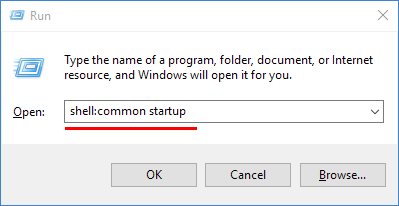
Note also that there is actually a second Startup folder. The Startup folder above is for your user account only.
The second Startup folder is for programs that run at startup for all users on the computer. To find that Startup folder, we have to modify our Win-R trick slightly:
If the program you’re seeing at startup isn’t in either of the Startup folders, try uninstalling the program itself. Many programs run when Windows starts, but they are launched via other more complicated methods.
networking, windows 10, windows update
ISSUE:
I have a client where the Windows 10 update was installed overnight and it has broken the ability for one of the pc’s to access the other pc for file shares. It is a small network (only 2 pc’s) both running W10 Pro. The main pc can see the shares on the other pc but the one I want to see the main pc shares can only see the main pc in networks but not see any shares.
RESOLUTION:
On the sharing pc, after many attempts in getting it going, I did this and it worked:
- Control Panel > System and Security > Administrative Tools > Local Security Policy > expand Local Policies > Security options
- Click on Network security: Lan Manager Authentication level > Then in the field select > Send NTLMv2 responses only > click on Apply, then ok and close all
- Restart your pc.
NOTE:
Windows 10 version 1709 disables SMB 1.0

networking, windows 10
Ethernet and/or WiFi adapter sees available network,
But will not accept tcp/ip address – Will see Network icon in System Tray but will have “Exclamation mark”.
A reset of winsock and/or IP stack, may resolve the problem.
Usually – have success with a reset of winsock, then a restart.
WARNING !!!
This command must be applied at the local machine level.
Applying command on RDS network stack, will result in loss of connection for all users !!!
1. In the search box on the taskbar, type Command prompt, press and hold (or right-click) Command prompt, and then select Run as administrator > Yes.
Note:- Requires Administrator Credentials
2. At the “Administrative” Command prompt, run the following command.
- Type netsh winsock reset and press Enter.
- Restart computer.
Optional – Full technical Fix:-
At “Administrative” Command prompt, run the following commands in the listed order, and then check to see if that fixes your connection problem:
- Type netsh winsock reset and press Enter.
- Type netsh int ip reset and press Enter.
- Type ipconfig /release and press Enter.
- Type ipconfig /renew and press Enter.
- Type ipconfig /flushdns and press Enter.