
azure, compliance, IT Cyber Security Technical Knowledge, m365, microsoft, o365
Microsoft recently turned on security defaults for M365 Tenants forcing MFA for users.
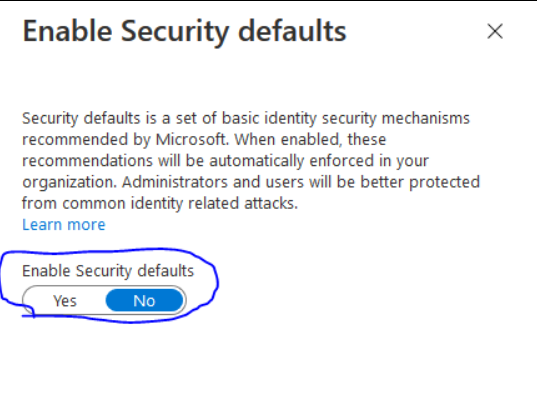
You can check by going into Azure AD > Properties > Manage Security defaults
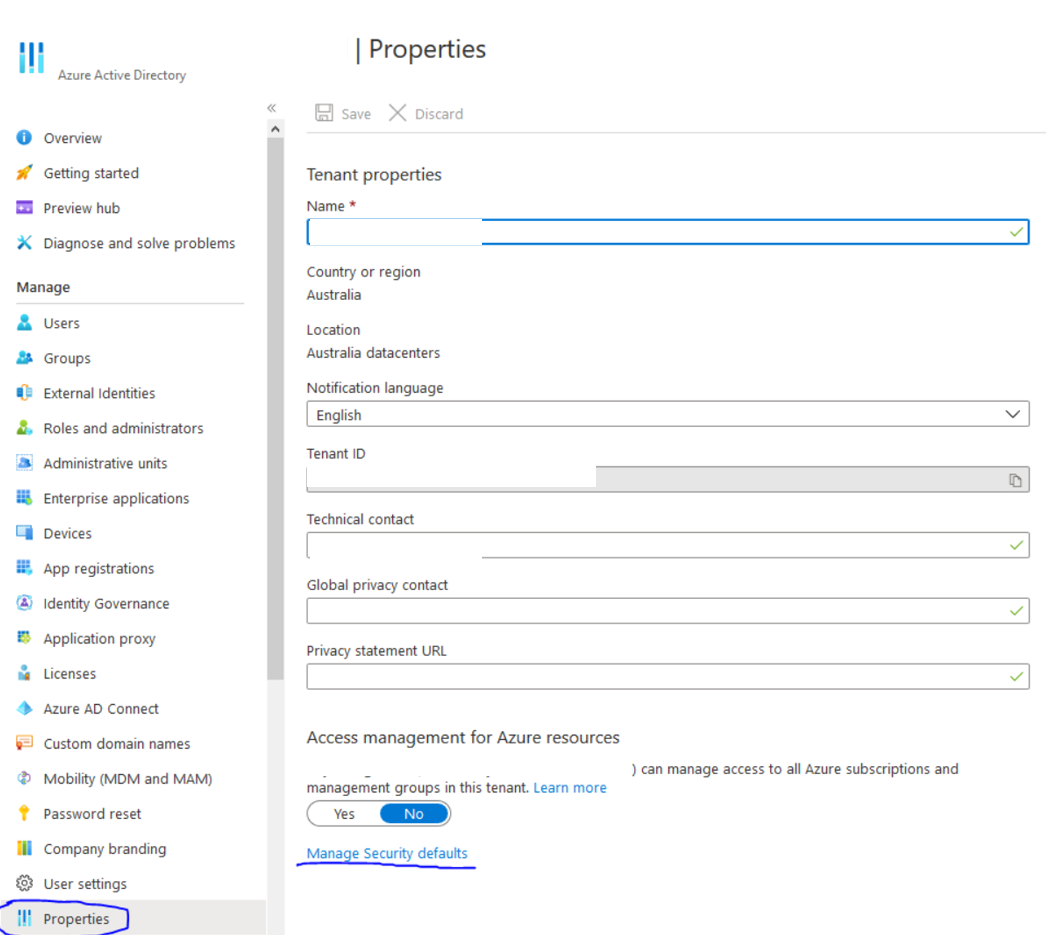
If defaults are set to “Yes” that is the reason MFA turned on. You should be able to set that to NO to remove the “new” defaults and turn MFA off. – However it is highly recommended to use MFA for all accounts.

active directory, compliance, gpo, group policy, IT Cyber Security Technical Knowledge, microsoft, networking, ransomware, Windows Server
Create Group Policy to Whitelist Applications – Ransomware prevention
Recommended to test Whitelisting in a test environment before deploying in production environment. Purpose is to Block Ransomware, Block Java Updates You will need to manually add Whitelist entries for each new Java Update you wish to install
Go to https://java.com/en/download/
Take note of the latest Java Version (eg, 8u301)
Login to your to a server that can Access/Create/Edit Group Policy objects
Open the run command, type in gpmc.msc – Click OK
Right click on the Organizational Unit you wish add the Whitelist to, Select the first option.
(Create GPO)

Enter a name for the Whitelist, Click OK (i.e CryptoLocker/Ransomware Prevention)
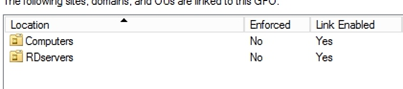
Link the newly create GPO to any other Organizational Units you want to be added to the GPO.
(eg. Right click on Computers OU, ‘select Link an Existing GPO…’ then select the new GPO)
Right click on the GPO, click Edit…
Drill down in; Computer Configuration >> Policies >> Windows Settings >> Security Settings >> Software Restriction Policies
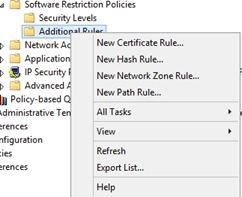
Right click on Software Restriction Policies, Select the first option

Right click on Additional Rules, Select New Path Rule…
Enter the following path: %localAppData%\*\*.exe
Security Level = Disallowed
Click OK

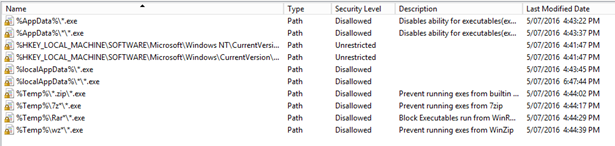
Create Additional Path Rules for the following paths:
%localAppData%\*.exe
%AppData%\*.exe
%AppData%\*\*.exe
%Temp%\*.zip\*.exe
%Temp%\7z*\*.exe
%Temp%\Rar*\*.exe
%Temp%\wz*\*.exe
Your list should look like this:
Exit out of Group Policy Editor.
Create another GPO called Cryptolocker/Ransomware – Whitelist Allow (Link to same OU’s as previous GPO)
Right click on the GPO, click Edit…
Drill down in; – Computer Configuration >> Policies >> Windows Settings >> Security Settings >> Software Restriction Policies
Right click on Software Restriction Policies, Select the first option
Right click on Additional Rules, Select New Path Rule…
Under ‘Path:’ enter the path of the Java Installer you wish to allow:
%localappData%\temp\jre-8u301-windows-i586-iftw.exe
Depending on which version of Java you are updating, replace ‘8u91’ with the version you want to allow.
Set Security Level to ‘Unrestricted’
Enter an appropriate description name.
Click OK.

Verify that new Path Rule has been added to Whitelist.
Close GPO Editor.
Refresh Group policy Management
Go down to the Whitelisting Çryptolocker/Ransomware – Whitelist Allow GPO, click on it once
In the window on the right select ‘Settings’ from the tabs.
Drill down to; Computer Configuration >> Policies >> Windows Settings >> Security Settings >> Software Restriction Policies/Additional Rules
Verify that new Path rule is shown in Policy List.
Exit Group Policy Management.
Go to a machine what is linked to the GPO to test whitelist.
Run Java Updater/Installer
Note the successful installation of Java
If fails = Perform forced Update to GPO
From Administrative Command Prompt,
gpupdate /force

active directory, auditing, compliance, microsoft, networking, shared folder, windows 10, Windows Server
Audit all access to folders and/or files on a server or workstation.
Log onto the server/workstation that you wish to enable auditing on.
Open Local Group Policy Editor.
CTRL + R
gpedit.msc

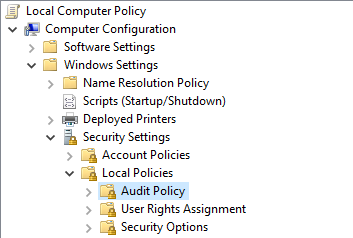
Browse to the following location: – Computer Configuration > Windows Settings > Security Settings > Local Policies > Audit Policy
Double click ‘Audit object access’

Select Success and Failure
Click Apply then OK

Exit Local Group Policy Editor
Navigate to the folder/file you wish to track permission changes.
Right click the folder/file then select Properties.
Select the Security tab then select Advanced

Select the Auditing tab then select Continue (if prompted)

Click Add

Click Select a principal

Type ‘everyone’ then select Check Names. – Click OK

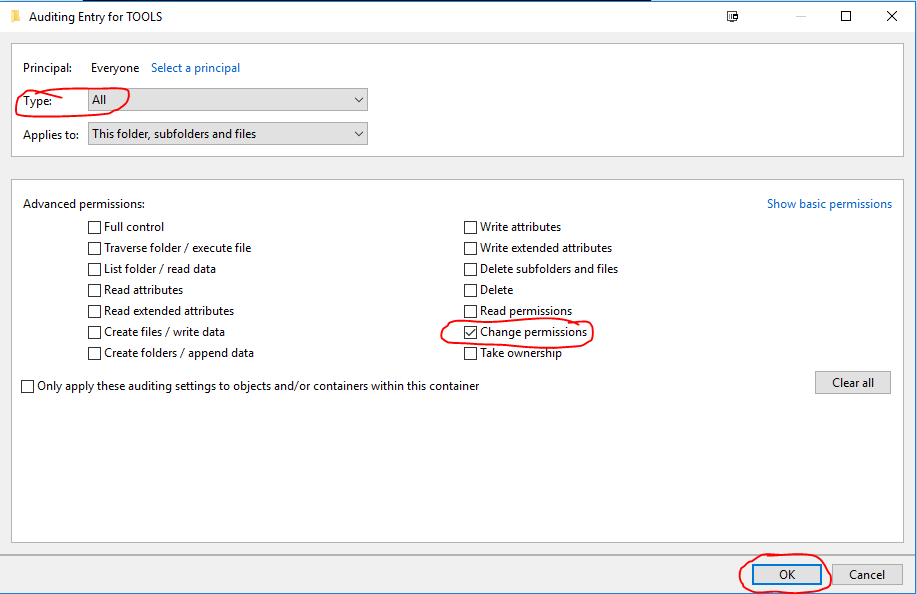
Set the Type: to All
Untick the default auditing permissions and only select ‘Change permissions’ – Click OK
Click OK Twice more.
Open up cmd or powershell as ADMIN
Execute the command: gpupdate /force
Auditing is now implemented on the specific folders/files.
To check audit logs open Event Viewer.
Select the Security Logs
Filter the logs based on Event ID 4670
microsoft, networking, openssl, ssl, Windows Server
Convert SSL Certificate to .pfx format (Microsoft IIS)
Obtain a SSL Certficate from a trusted CA (Certificate Authority)
Usually you receive three certificates from the CA, SSL Certificate, CA Bundle and a Private key
In this tutorial we will be using the SSL Certificate and Private key.
Create a new text document on your local machine called private_key.key paste the contents of the private key from the CA into the file.
Save the file. (Make sure it is saved as .key)
Repeat the same process for the SSL Certificate
Copy the contents of the SSL Certificate key field
Create a new text document on your local machine called public_ssl_key.cer paste the contents of the SSL Certificate into the file.
Save the file. (Make sure it is saved as .cer)
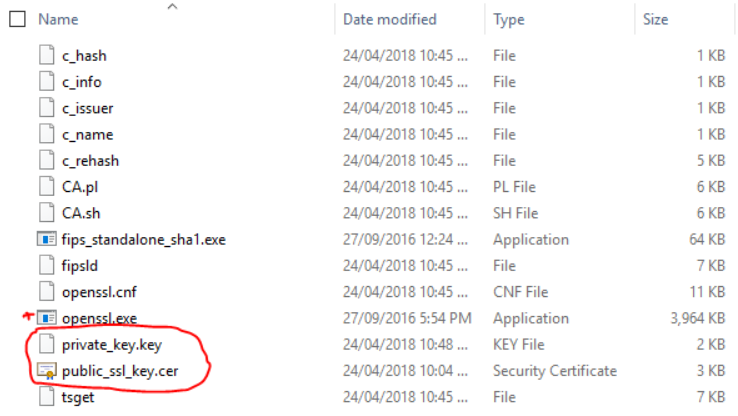
You will end up with the following 2 files

To bind the public/private key pair and a set password for .PFX File you will need to download OpenSSL
Download OpenSSL: https://sourceforge.net/projects/openssl/files/latest/download?source=files
Once downloaded extract the contents of the OpenSSL folder and browse to the bin folder.
Open Powershell as Administrator and change to the directory of the bin folder.
Example: cd C:\openssl-1.0.2j-fips-x86_64\OpenSSL\bin
Copy the previously created SSL files containing the Public and Private key into this directory.
Execute the following command to generate a .PFX file with a password
.\openssl.exe pkcs12 -export -inkey private_key.key -in public_ssl_key.cer -out ssl_cert.pfx
(This will create a .pfx called ssl_cert.pfx and will be saved in same directory as the bin directory.)
You will then be prompted to enter a password for the .PFX file.

The .PFX file will then be generated with a password attached to it.

You can now use this certificate to Import into IIS on Windows Server or via Windows MMC Console.
active directory, hyper-v, microsoft, networking, rds, rwa, Windows Server, windows update
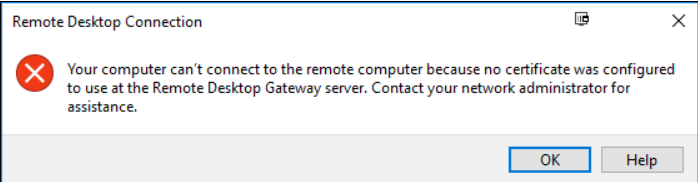
Remote Web Access (RWA) SSL Gateway not working after Windows Update
After installing Windows updates you may get the following error when trying to logon to RDS via RWA (Remote Web Access)
Log into the Domain Controller
Open Powershell as ADMIN
Run the following command:
dism /online /Enable-Feature:Gateway-U

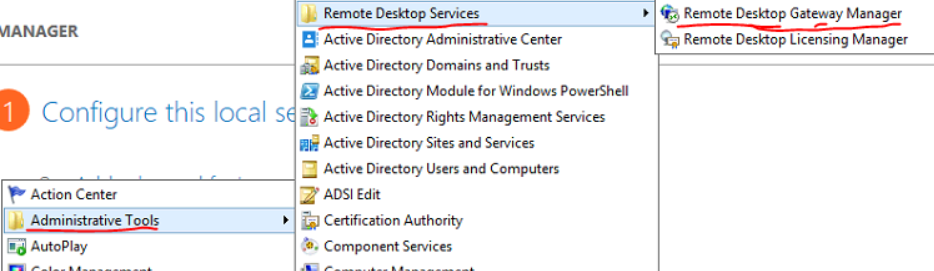
Open the Remote Desktop Gateway Manager from Administrative Tools > Remote Desktop Services.
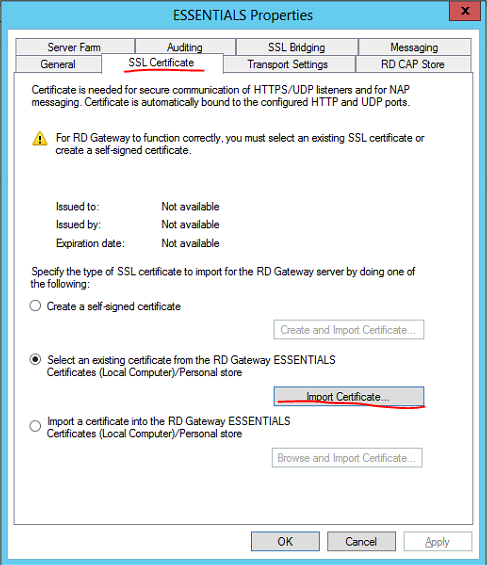
Right click the server name then select Properties
Select the SSL Certificate tab then select Import Certificate…
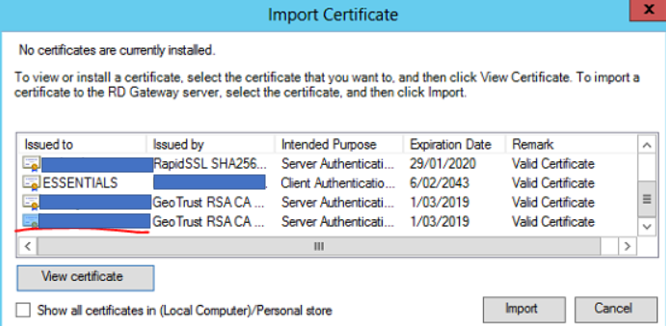
Select the correct SSL certificate for the Remote Desktop Gateway then select Import
Click Apply then OK
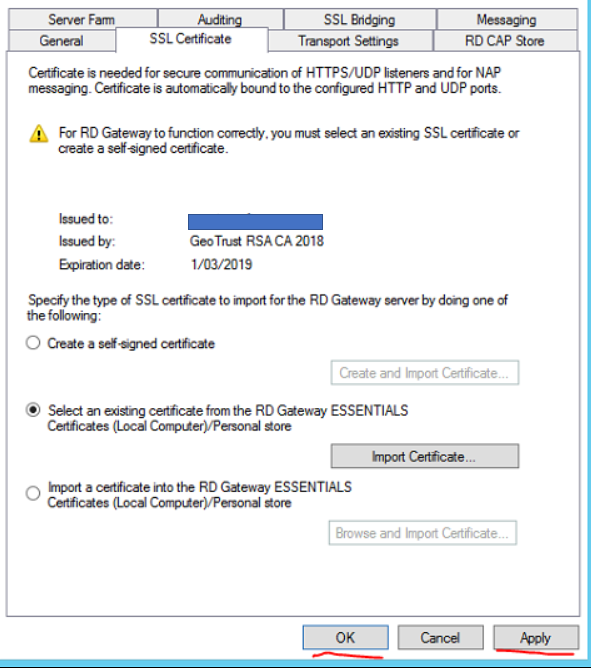
Close Remote Desktop Gateway Manager
Test connectivity via RWA

azure, o365
You may want to stop end users from Accessing the Azure AD portal, as they can all view all user accounts and the email addresses associated with user accounts.
Follow the steps below to block user from Accessing Azure AD.
Login to Azure as global admin
Go the Azure AD > User Settings
Also select ‘No‘ for ‘Users can register applications’
Select ‘Yes‘ to ‘Restrict access to Azure AD administration portal’
Optional – Select ‘No‘ for ‘LinkedIn account connections’

End users will now be unable to view other users email addresses and names in Azure AD.