
active directory, compliance, gpo, group policy, IT Cyber Security Technical Knowledge, microsoft, networking, ransomware, Windows Server
Create Group Policy to Whitelist Applications – Ransomware prevention
Recommended to test Whitelisting in a test environment before deploying in production environment. Purpose is to Block Ransomware, Block Java Updates You will need to manually add Whitelist entries for each new Java Update you wish to install
Go to https://java.com/en/download/
Take note of the latest Java Version (eg, 8u301)
Login to your to a server that can Access/Create/Edit Group Policy objects
Open the run command, type in gpmc.msc – Click OK
Right click on the Organizational Unit you wish add the Whitelist to, Select the first option.
(Create GPO)

Enter a name for the Whitelist, Click OK (i.e CryptoLocker/Ransomware Prevention)
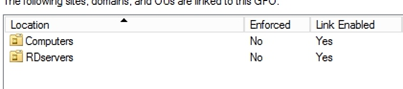
Link the newly create GPO to any other Organizational Units you want to be added to the GPO.
(eg. Right click on Computers OU, ‘select Link an Existing GPO…’ then select the new GPO)
Right click on the GPO, click Edit…
Drill down in; Computer Configuration >> Policies >> Windows Settings >> Security Settings >> Software Restriction Policies
Right click on Software Restriction Policies, Select the first option

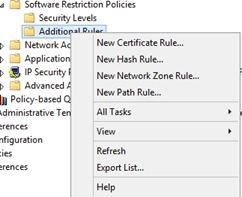
Right click on Additional Rules, Select New Path Rule…
Enter the following path: %localAppData%\*\*.exe
Security Level = Disallowed
Click OK

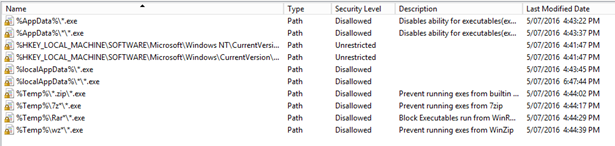
Create Additional Path Rules for the following paths:
%localAppData%\*.exe
%AppData%\*.exe
%AppData%\*\*.exe
%Temp%\*.zip\*.exe
%Temp%\7z*\*.exe
%Temp%\Rar*\*.exe
%Temp%\wz*\*.exe
Your list should look like this:
Exit out of Group Policy Editor.
Create another GPO called Cryptolocker/Ransomware – Whitelist Allow (Link to same OU’s as previous GPO)
Right click on the GPO, click Edit…
Drill down in; – Computer Configuration >> Policies >> Windows Settings >> Security Settings >> Software Restriction Policies
Right click on Software Restriction Policies, Select the first option
Right click on Additional Rules, Select New Path Rule…
Under ‘Path:’ enter the path of the Java Installer you wish to allow:
%localappData%\temp\jre-8u301-windows-i586-iftw.exe
Depending on which version of Java you are updating, replace ‘8u91’ with the version you want to allow.
Set Security Level to ‘Unrestricted’
Enter an appropriate description name.
Click OK.

Verify that new Path Rule has been added to Whitelist.
Close GPO Editor.
Refresh Group policy Management
Go down to the Whitelisting Çryptolocker/Ransomware – Whitelist Allow GPO, click on it once
In the window on the right select ‘Settings’ from the tabs.
Drill down to; Computer Configuration >> Policies >> Windows Settings >> Security Settings >> Software Restriction Policies/Additional Rules
Verify that new Path rule is shown in Policy List.
Exit Group Policy Management.
Go to a machine what is linked to the GPO to test whitelist.
Run Java Updater/Installer
Note the successful installation of Java
If fails = Perform forced Update to GPO
From Administrative Command Prompt,
gpupdate /force

active directory, auditing, compliance, microsoft, networking, shared folder, windows 10, Windows Server
Audit all access to folders and/or files on a server or workstation.
Log onto the server/workstation that you wish to enable auditing on.
Open Local Group Policy Editor.
CTRL + R
gpedit.msc

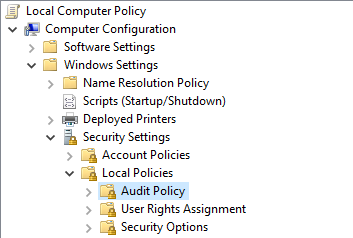
Browse to the following location: – Computer Configuration > Windows Settings > Security Settings > Local Policies > Audit Policy
Double click ‘Audit object access’

Select Success and Failure
Click Apply then OK

Exit Local Group Policy Editor
Navigate to the folder/file you wish to track permission changes.
Right click the folder/file then select Properties.
Select the Security tab then select Advanced

Select the Auditing tab then select Continue (if prompted)

Click Add

Click Select a principal

Type ‘everyone’ then select Check Names. – Click OK

Set the Type: to All
Untick the default auditing permissions and only select ‘Change permissions’ – Click OK
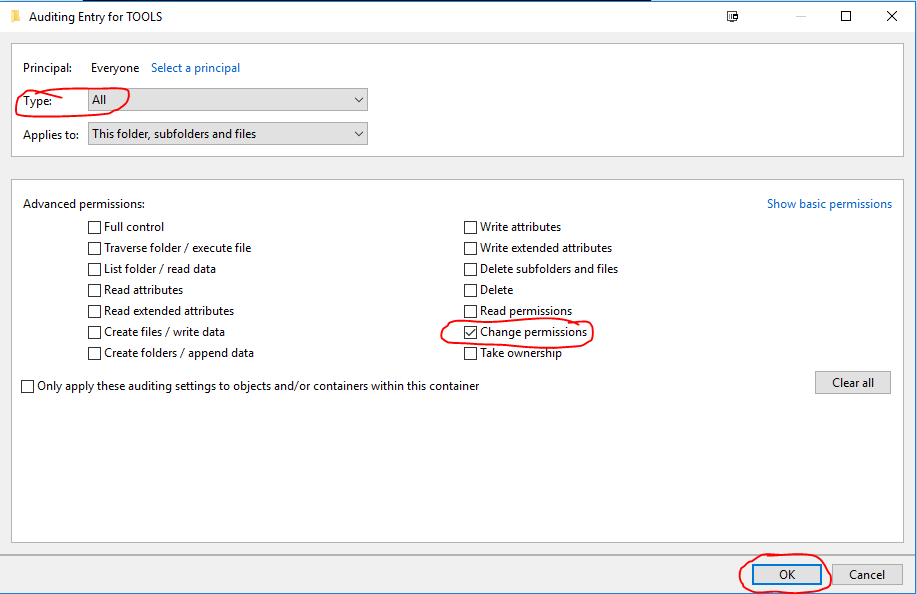
Click OK Twice more.
Open up cmd or powershell as ADMIN
Execute the command: gpupdate /force
Auditing is now implemented on the specific folders/files.
To check audit logs open Event Viewer.
Select the Security Logs
Filter the logs based on Event ID 4670

active directory, licensing, microsoft, rds, rwa, Windows Server
You may want to move the existing RDS licenses to a new server to put an old operating system out of production or just upgrade in general.
Login to the server as an administrator
Install the Remote Desktop Licensing Server and Gateway Role via Server Manager
Once installed open Remote Desktop Licensing Manager from Server Manager

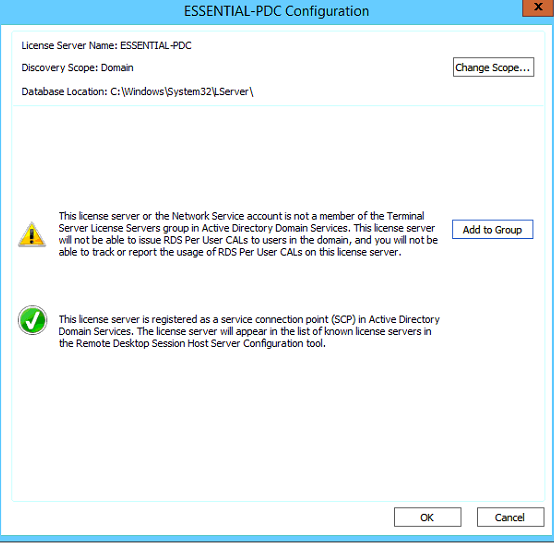
Add the current server into the Terminal Server License Server group as per below,
Select Add to group.


Right click on the server name and select Activate Server

Select Next at the Connect Method screen, (Automatic connection (recommended) is the default)
Enter the relevant information (Company Information) then select Next
Proceed to the next page and fill out additional information.
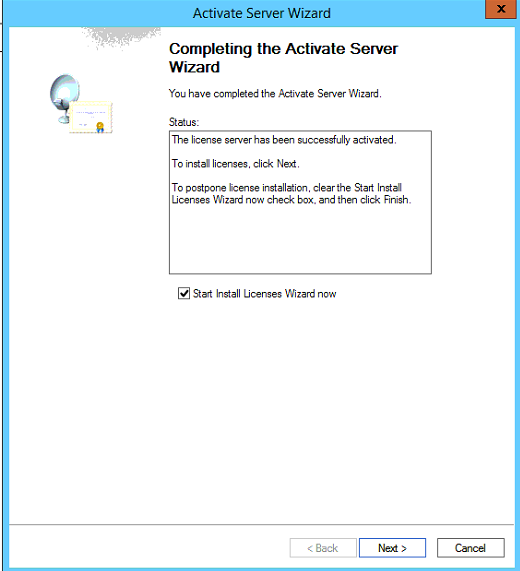
Click Next and the server will activate
On the new licensing server add the old server into the console by select Action > Connect
Enter the IP Address of the old licensing server.
The old server should now be visible on the new server.
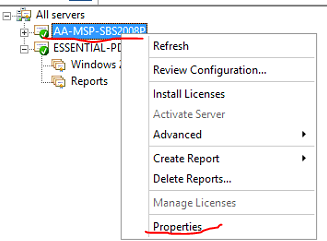
To get the licensing ID right click on the old server and select properties
To get the licensing ID right click on the old server and select properties

Select the new licensing server, then go to Action > Manage licenses
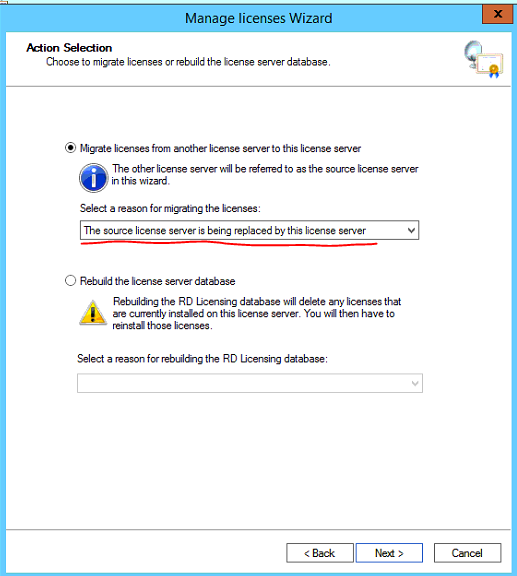
Once the window opens select Next
Select the first option as shown below.
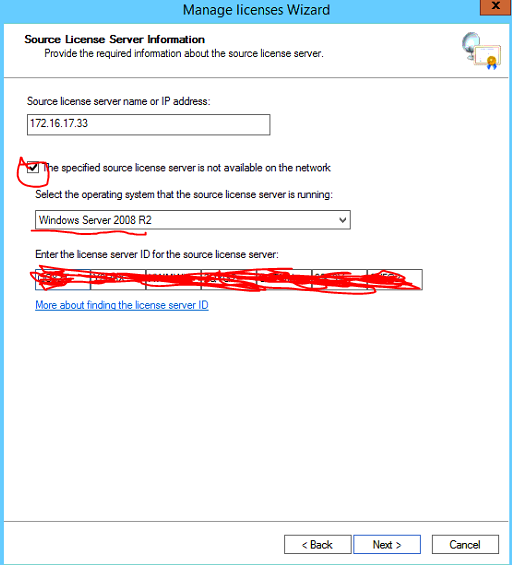
Select the checkbox and select the operation system the old licensing server is running.
Enter the license server ID previously copied, Select Next
Tick the checkbox to agree to manually remote the licenses from the source server then select next.
If the old licensing Server is running Windows Server 2008 not 2008 R2 you will need the original RDS CAL licenses (Refer to documentation) to apply to the new licensing server as a 2008 server cannot automatically migrate the RDS CAL licenses, only 2008 R2 and above.
If the old licensing Server is running 2008 R2 or above proceed through the wizard to migrate the RDS CAL licenses.
After you have verified the licences are activated and functional you can deactivate the old RDS licensing server.
Once deactivated uninstall the RDS licensing role via Server Manager

Exchange, microsoft, networking, Windows Server
Post Windows Updates you may notice Microsoft Exchange services and other dependent services are disabled you can check this by viewing services.msc
Execute the powershell commands below on the Exchange Server to get the services up and running.
First, we have to know which services there are and which need to have their startup type changed. I used the Get-Service cmdlet to find out. In my case, I was just interested in the Exchange Services, so I needed to filter them with the following command:
Get-Service | Where-Object { $_.DisplayName –like “Microsoft Exchange *”} | ft Name,Status
The output told me which services needed to have their startup type changed. To do that, I only had to change the entry after the last Pipe. (To change the startup type I don’t need a displayed output, but I need to change the startup type for the selected services.) This I did with the following cmdlet:
Get-Service | Where-Object { $_.DisplayName –like “Microsoft Exchange *” } | Set-Service –StartupType Automatic
The Exchange Services startup type was changed from disabled to automatic. But they were still not running. To start the services, we can use the following cmdlet:
Get-Service | Where-Object { $_.DisplayName –like “Microsoft Exchange *” } | Start-Service
Next step, IIS
After the Exchange Services have all changed their startup type and status, we are almost done. There is another service we also have to think about IIS
To edit the IIS Admin Service, we can follow the same concept as we did with the Exchange Services. First, we need to identify the services and set the startup type to automatic. For that, we can use this cmdlet:
Get-Service | Where-Object { $_.DisplayName –eq “IIS Admin Service” } | Set-Service –StartupType Automatic
Last but not least, we also need to start IIS Admin Service. This we can do with the following cmdlet:
Get-Service | Where-Object { $_.DisplayName –eq “IIS Admin Service” } | Start-Service

dell, hardware, java, Windows Server
iDRAC – Unable to launch application error
You may come across an issue when trying to access the iDRAC virtual console.
When attempting to launch iDRAC virtual console you may get the following error.

If you click Details
it may something about a certificate issue.
Click Close, exit out of the iDRAC Java applet

The java.security file will need to be edited to allow SSL certificates lower than 1024 bits encryption.
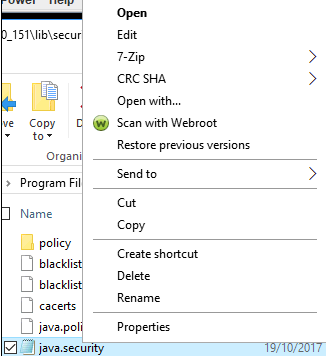
Navigate to C:\Program Files (x86)\Java\<version>\lib\security\
Right click on the java.security file and Open With Notepad
Search for the string (CTRL +F) named
jdk.jar.disabledAlgorithms=MD2, MD5, RSA keySize < 1024
Once found, put a hashtag (#) infront of it to disable this setting

Save the java.security file to the Desktop as it will not let you directly save it to the current file path.
Once saved drag and drop the java.security file from the Desktop into the Java path you were previously in.
C:\Program Files (x86)\Java\<version>\lib\security\
Overwrite the current java.security file
Go back into the iDRAC and download a new Virtual Console Java applet.
You should no longer have the error message that was being displayed.
YOU MAY NEED TO PORT FORWARD PORT 5900 TCP if having ‘Connection has been dropped’ issue